Showing posts with label character. Show all posts

Sunday, December 4, 2022

A demogorgon for Wendy

I am really pleased with how well this Stranger Things Demogorgon free pattern by Andrea Leek turned out. My grandniece Wendy is a huge fan of "Stranger Things," so this will be her birthday present. 


I decided to make the demogorgon in a slightly less demonic chibi ragdoll style. I worked the pattern as written for the legs and arms but subtracted two rows from the torso to shorten it slightly. I worked the head separately so it could be stuffed and closed and then stitched to the top of the unstuffed torso. Legs and arms are also unstuffed.


The toes, fingers, and "flower" face are worked as written in the pattern. Don't worry if the flower seems too full and wants to curl as you make it; it will straighten out as you stitch it to the head. I added more teeth to this one than was shown in the pattern to resemble the original character more closely.


I worked on this back in July and August, so my only problem was having to wait so long for December to get here so I could gift this little guy to Wendy! 

Even though my yarncraft productivity has fallen dramatically in recent years due to my chronic pain issues, it felt great to be able to finish this project. And now I bet Wendy's sister Charlotte will want me to make one for her too! 💜

Tuesday, November 2, 2021

Cookie Monster costume hat

Cookie Monster is my all-time favorite Muppet, so I wanted to make a messy-bun-style hat of this character. I started mine too late to wear it for Halloween this year, but I'll totally be ready next year!


I used a variation of the Loopy Chemo Cap pattern from my free Chemo Cap Bundle. Instead of starting at the very top of the hat, I started with 40 foundation HDCs (the equivalent of round 4) and then continued to work the pattern as written from there.


I used the Addi Pro 22-needle knitting machine to make the white part of Cookie Monster's eyeballs. My first attempt turned out looking super lumpy and squished, which led me to conclude that the eyes needed a bit of polyfil stuffing to help them hold their round shape.


To make the eyeballs: Cast on with white yarn and knit for 19 rows. Cut a long tail and use a bent-tip needle to cast the stitches off the machine. Gently stretch the knitted piece, and then gently cinch the ends. Fold one end inside the other (same as when you're making a beanie). Pull the yarn tails through the "top" of the cinched ends and knot securely. (This cinched end will be the front of the eyeball; you will later cover this cinched end with a crocheted black pupil.) Thread one tail onto a yarn needle. Grab one handful of polyfil and poke the needle through the center of the polyfil, then slide the polyfil down the yarn tail until it's sitting inside the "cup" of the eyeball. Using the tail on the yarn needle, pick up the bar in the middle of every third stitch along the top of the folded edge (these stitches will be used to cinch closed what is currently the folded end of the eyeball). Gently pull on the yarn tail to cinch the folded end closed, then stitch across the cinched opening to secure. Thread the other yarn tail onto the needle and poke it through the center of the eyeball and out the other side that you just cinched closed. Being careful not to pull too hard and squish/flatten the eyeball, knot the yarn tails together again several times to secure. Leave the long white tails for now so you can use them later to sew the eyeball onto the hat.


Using black yarn, crochet a small "pupil" for each eyeball by working 6 SC into a magic circle. Use the invisible joining technique to finish the outer edge. Tightly cinch the center of each pupil and knot to secure. Leave a long tail to sew each pupil onto the front of each eyeball, centered over the front cinched end. Knot to secure and hide black yarn tails inside the center of the eyeball.


Using the long white yarn tails, attach the eyeballs to the hat and knot several times to secure. Weave in ends and wear your Cookie Monster hat with pride!


Friday, October 8, 2021

Happy Halloweeeeen!

Heidi Yates of Snappy Tots has generously shared the pattern of her Frankenlight design for free on her blog. Go check it out! Her pattern makes a decorative cozy that fits over a pint- or quart-size canning jar and results in a super-cool decoration to add to your Halloween display.

I crochet a lot tighter than Heidi does, so I had to go up a few hook sizes to get a Franken-cozy size that would fit over a quart-size canning jar. 😊 But it worked out fine for me to follow the rest of the pattern as written (same stitch counts and row counts).

I love the technique Heidi uses to make Frankie's hair; it's much faster and easier than bobble stitch (in my opinion) and gives terrific texture. I used 9mm ball buttons for Frankie's freaky pupils, and I used this waterproof solar LED light string/lid/hanger for the top of the jar.

I think Frankenstein is the OG zombie, so I love this idea to make him into a hanging solar luminary as part of my Halloween holiday decor. (I've always preferred The Munsters to The Addams Family, bah-ha-ha.)

This turned out so cute that I had to make a few more of these in other characters to add to my Halloween display.

Next up I made this jack-o-lantern based on the same concept of Heidi's pattern. After completing the bottom rounds I worked the sides in a standard granny stitch for 11 rounds, then switched to the green and the smaller hook for the top edging. I added a curly green vine and the traditional black "cutouts" for the eyes and mouth, with some embroidered "teeth."


Finally, I based this ghost luminary on the same concept of Heidi's pattern. After completing the bottom rounds I worked the sides in a standard DC-ch 1 mesh for 11 rounds, plus a couple of rounds of SC for the top edging.


I deviated from Heidi's pattern for the base on all my Halloween luminaries, because I wanted the crochet to be open to allow light to shine through the bottom when these are hanging up. On this white one, I like the way the base of my ghost cozy resembles a spider's web. Maybe I could make another one of these in white and trim it with a plastic spider?!


For the ghost face and arms, I turned to the Emojipedia's Ghost Emoji page for inspiration, thinking it would be cute if I could make my ghost resemble the emoji.


Monday, December 17, 2012

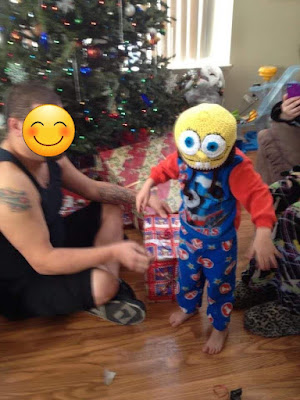
SpongeBob child's hat free pattern

A friend of mine is going through a rough patch financially this Christmas season, and since her grandson loves SpongeBob, I went looking for a free pattern to make him a nice warm hat that looks like his favorite character.


I found this really great looking SpongeHat design by Ashley Phelps on Ravelry. I hope my friend's grandson loves this hat as much as I do!


Saturday, September 29, 2012

Minion hat

This minion hat is a work in progress (meaning that I still need to sew on the smile and some strands of hair), but I have to admit — I've never seen the movie, which is making it difficult for me to decide which grandniece or -nephew to give it to. 

Any of you out there who have seen "Despicable Me," do you think it would be OK to give a minion hat to a preschooler? Or would that be considered too "edgy" or something? Please advise! Thanks!


I followed the quick, easy, and free Minion Hat pattern by Elizabeth Mohsin, which is available on Ravelry.

Monday, January 30, 2012

Sock Monkey Blanket free pattern

I used the free pattern by Linda Cyr, available at the Yarnspirations website, to make this cute hooded Sock Monkey Blanket for baby Caleb. Here is my boyfriend modeling it:

I followed the pattern as written, but since I tend to be a tight crocheter, the finished blanket turned out way too stiff for my liking, so, sadly, I ended up frogging the yarn to use for another project.

This design IS super cute, though, so hopefully I'll try it again sometime, knowing that I definitely need to work with a larger hook.