Saturday, November 28, 2020

Quick and easy CPAP hose cozy

Knitting machines with 22 needles are the perfect size to knit cozies to cover a CPAP air hose. 

I didn't precisely count the rows on this project on the Sentro 22, but it's pretty close to 390 rows of knitting (about 72 inches) with a few rounds of SC (5.5mm hook) on each end for stability.

Red Heart Super Saver Neon Stripes colorway

I'll probably also add two straps with ends secured by small buttons at one end of the cozy so the straps can hold the wearer's mask end of the hose up close to the mask to keep the cozy from slipping down during use.

It only took about an hour to machine knit this piece. Attempting to knit the same thing by hand would have taken me weeks (and probably at least 12 hours) of work. So having a knitting machine available is a huge help to me for projects like this. I do love to hand knit (and there are lovely stitches you can hand knit that a machine like this will never be able to replicate), but I have chronic pain issues that severely limit how much hand knitting I can do.

**UPDATE**

I knitted another one of these using the Red Heart Super Saver Jumbo Stripes in the Bright Stripe colorway on my Addi 22, which has a row counter on it (hallelujah!!). On the Addi, I was getting about 5 rows per inch. At that gauge, it takes 360 rows to make a 72-inch-long tube, so that's how many rows I made the Bright Stripe cozy, plus leaving extra yarn at each end to crochet the edging and straps. (I forgot that I usually prefer to make the tubes more like 74 inches long to better fit the CPAP air hose ... so in that case the knitted tube should have been 370 rows. Mental note for next time!!)

Making a tube this long works best if you can mount your knitting machine on a table where the work can hang free down the middle, such as my Workmate table shown in the photos. Even at that height, I still had to tuck in the end of the tube for about the last 100 rows to keep it from dragging on the floor.


The mask-end straps are each 16 chains long, then slip stitch back across the chain to reinforce.


The colors are pretty similar between the Neon Stripes and the Bright Stripe colorways, but I think I like the Bright Stripe better because it doesn't have a black band in between every other color stripe. I guess whichever one would be better just depends on what you want your project to look like. They are both fun and funky colorways.


Saturday, September 12, 2020

Sparkle Pumpkin

The Taylor Lynn YouTube tutorial at this link suggests 45 rows for pumpkins made on the Sentro 40, but I made this one 52 rows tall because that was how many rows it took to use up the small hank of this yarn I had on hand. I mean, after all, real pumpkins come in all shapes and sizes, so why not add a few extra rows to this one? 😉

I wasn't sure how this metallic yarn would work in my machine (wasn't sure if the metallic filament would get separated/tangled in the needles, etc.), but the yarn ran through perfectly smoothly. In fact, I'm used to having to constantly monitor the stitches on my machine to make sure none has dropped (because my machine ALWAYS drops at least one stitch during every project), but this yarn ran through without one single stitch dropping. Amazing!

Finished it off with half of a cinnamon stick for a stem. I think the green color will make a nice contrast to more traditional color pumpkins in my fall display.


Update 10/20/2022: Two years later and I'm still tinkering with this pumpkin. 😊 I decided to crochet a stem to replace the cinnamon stick, figuring that the crocheted stem would fit the scale of the pumpkin better and also be child-friendly. The stem is made with a small amount of Big Twist yarn in the Taupe colorway. And then I went on and added some curly vines, one in Taupe, one in Red Heart Super Saver in Saffron, and one in a double strand of Fixler Brothers Quick Knit Sport in 018 (yellow). How you like me NOW?!? 😂


Friday, September 4, 2020

Proud Santa Hats

I started this project right after last Christmas after seeing a photo of something similar online, but for whatever reason I didn't make a project page on Ravelry at that time. So I actually mostly finished making the hats months ago, but they sat on the table in my sewing room waiting for me to weave in the ends and add the pompoms, which I finally did today. 


I made the tail on one hat a little longer and on the other hat a little shorter just for some differentiation between the two. Fiber Spider has a good tutorial on YouTube for how to crochet a seamless, top-down stocking cap. I modeled these caps after most of his instructions and then added the rainbow stripes using HDC in the 3rd loop before finishing with the ribbing in white.


But since I did most of the work on these nearly a year ago, I can't remember anymore what size hook I used or what colorways the yarns are, etc.! Oh well. I'm still excited to get these in the mail to Mika and Emmy so they can wear them this coming holiday season. I hope they like the hats!


Saturday, August 29, 2020

Doughnut Buddies

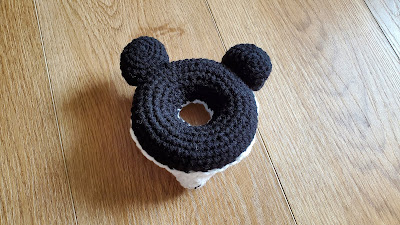
These Doughnut Buddies toys are so sweet (pun intended) and quick and easy to make. Each one can be made in an evening (about 4-6 hours each max, depending on the level of detail). Watch out -- these are fun and addictive. 😊


The only reason these project took me multiple days was because I had to wait for an order of safety eyes to arrive in the mail. 😄


Rachel Zain, the designer of all these adorable Doughnut Buddies, generally doesn't tell you in the patterns which colors to use at each step -- and that's fine because it allows for individual creativity. I made my Baby Yoda buddy on a burlap-brown base doughnut to represent The Child's robe, with green icing (of course) for his face and ears. (Rachel used the same green doughnut base on her alien as the icing, which is perfectly all right, too, of course.) 


And, of course, I simply HAD TO make a Mandalorian to go with my Baby Yoda. 😜


Tip: Leave a 14-inch-long tail before chaining to make the icing layer. This gives you the length you need to attach the center ring of icing to the doughnut.


I freehanded a couple of Doughnut Buddies last year as a gift for Lilliana, but it's fun to now have the official patterns to learn from and use as a jumping-off point for more creativity.


Wednesday, August 26, 2020

The knitting clock

Asking price for this is not disclosed, so it's probably not in my budget. 😆 But aside from price this grandfather clock is SO me. 

http://www.sirenelisewilhelmsen.com/#grandfatherknittingclock