When I was in first grade I had a classmate who wore a rabbit fur coat that all the girls in my class simply adored. (This was in the 1970s, OK, so wearing fur wasn’t yet culturally verboten.) All I can remember about this girl now is that her name was Elaina and she was of Russian descent. She spoke English with a Russian accent, and to the rest of us 6-year-olds who had never heard a foreign accent like that before, all the words she spoke sounded deliciously exotic to our ears.
As I recall her jacket was made with either a white-mottled-with-black rabbit fur or dalmatian rabbit fur. It was mostly white with black spots. In my mind’s eye the jacket looks more like the mottled rabbit fur photo below than the dalmatian rabbit (notice how the mottling creates some areas that look gray in the transition spaces between the black and white), although I remember her jacket having more white all over than this mottled swatch shows, but memory can be a funny (and incorrect) thing at times.
Anyway, I had several skeins of the Red Heart Zebra colorway yarn on hand, and looking at the colors reminded me of Elaina’s rabbit fur jacket - which, by the way, she never let any of us other girls in class try on (LOL) - so I decided to try to make a vest for myself using this yarn - and then I could pretend I was wearing Elaina’s sumptuous jacket any time I wanted to! :-)
This is a variegated yarn with moderately short color changes. (White about 13-15 inches, gray about 10-12 inches, black about 30 inches.) Personally I think variegated yarns with short color changes look better when worked in crochet vs. knitting.
I started this project back in July 2019 working it as an improvised top-down raglan vest in a granny stitch and got most of the way done with it but then decided I didn’t like the way the vest looked on me. Ultimately I decided to rip it out and start over using the On Point Poncho (paid) pattern as the shape inspiration for a long, fringed barn jacket. Fingers crossed that I like the way it turns out this time …
OK, I’ve reworked the jacket to the point where I can safely say that I do like it much better now by doing the On Point Poncho pattern as a cardigan. The body and fringe (two 14-inch strands folded together and placed in every-other stitch across the bottom hem, resulting in 7-inch fringe) are complete, and now I just have to decide how long to make the sleeves. I think I’ll finish them at 3/4 length (19 rows plus 1 row of SC edging) with minimal tapering (to 60 stitches around).
Total yarn weight: 945 grams or about 4.77 skeins / 976.0 yards.
Well, it took me a little more than a year (only working on it when we were camping in our RV), but I finally finished this afghan. The colors in the afghan coordinate nicely with the color scheme inside our RV, and the finished size makes a nice topper for the queen-size bed to add another layer of warmth on cold nights or to snuggle up with for a nap.
An idea popped into my head for crocheting a square-bottomed tote bag, but I wanted to make it in a continuous spiral (like I've done with some round bags I've made) to avoid having an ugly join at the end of each round. So that got me wondering if there was an easy way to crochet a square in a continuous spiral. If so, all I'd have to do is crochet the square bottom until it was as big as I wanted it to be (I'm thinking about a 12-inch-square base would make a good size for a tote), and then stop increasing but just continue working until the sides were as tall as I wanted.
I googled "crochet spiral square" and this video tutorial (below) popped up. It's exactly what I was hoping to find - a quick, easy way to crochet a square shape in a continuous spiral. So nifty! This could work for lots of different things ... coasters, tote bags, placemats, trivets, blankets, cushion covers ... the list goes on and on.
I'm working with stash yarn for this project. I started the spiral square in the Dark Sage yarn then switched to the green vintage Pingouin yarn when the Dark Sage ran out. When the spiral square was about 11 inches on each side I decided the base was plenty big to be a tote bag, which meant it was time to stop increasing and start working the sides of the tote.
I do admire the vintage look of crocheted totes worked in a ripple stitch, so instead of working straight sides I decided to make rippled sides instead. To do that I had to count the stitches on each side to identify the midpoint, which is where the ripple "pinches" or "valleys." The corners I already had from working the square base become the "peaks" in the ripple pattern.
Each side is 32 stitches, not counting the extra stitch at the top of each peak. I stopped working the five-stitch increasing corners used in the spiral square base and started working three-stitch corners for the entirety of the tote bag's sides. So the sides are worked, starting from the top of a peak/corner; DC 15 then work 2 DC2tog (double crochet decrease; you have one decrease on each side of the center of the tote bag's side (this creates the "valley"); DC 15 until the next corner; 3 DC in center-corner stitch from previous row. Continue this way until the sides are as tall as you want.
Six rows after starting the sides of the tote the Pingouin green ran out and I switched to an unlabeled royal blue yarn from my stash. After five blue rows the blue yarn ran out, so I switched to a purple yarn from my stash. I worked six rows in the purple.
To stabilize the top edge of the bag I continued in purple by working a row of SC. Then I turned the bag to work the next row of SC in the opposite direction (to prevent the edge from curling) and added a ch 1 at the top of each peak. I turned the bag again and worked one more round of SC, placing 3 stitches in the ch 1 space at the top of each peak. I finished off and weaved in the ends. So the finished bag is made with a total of about 25 rows.
I added a set of brown microfiber braid purse handles from Everything Mary, which have been sitting in my sewing room for nearly 10 years waiting for the right project to come along to attach them to. I most likely bought the handles at Joann or Michaels.
I ended up gifting this bag to my sister, Linda.
I decided that if I make another bag like this someday, I think next time I would keep
the 5-stitch peaks and offset them with two DC3togs in the valleys to
make the peak and valley shapes sharper. But overall I think this
project turned out well as is.
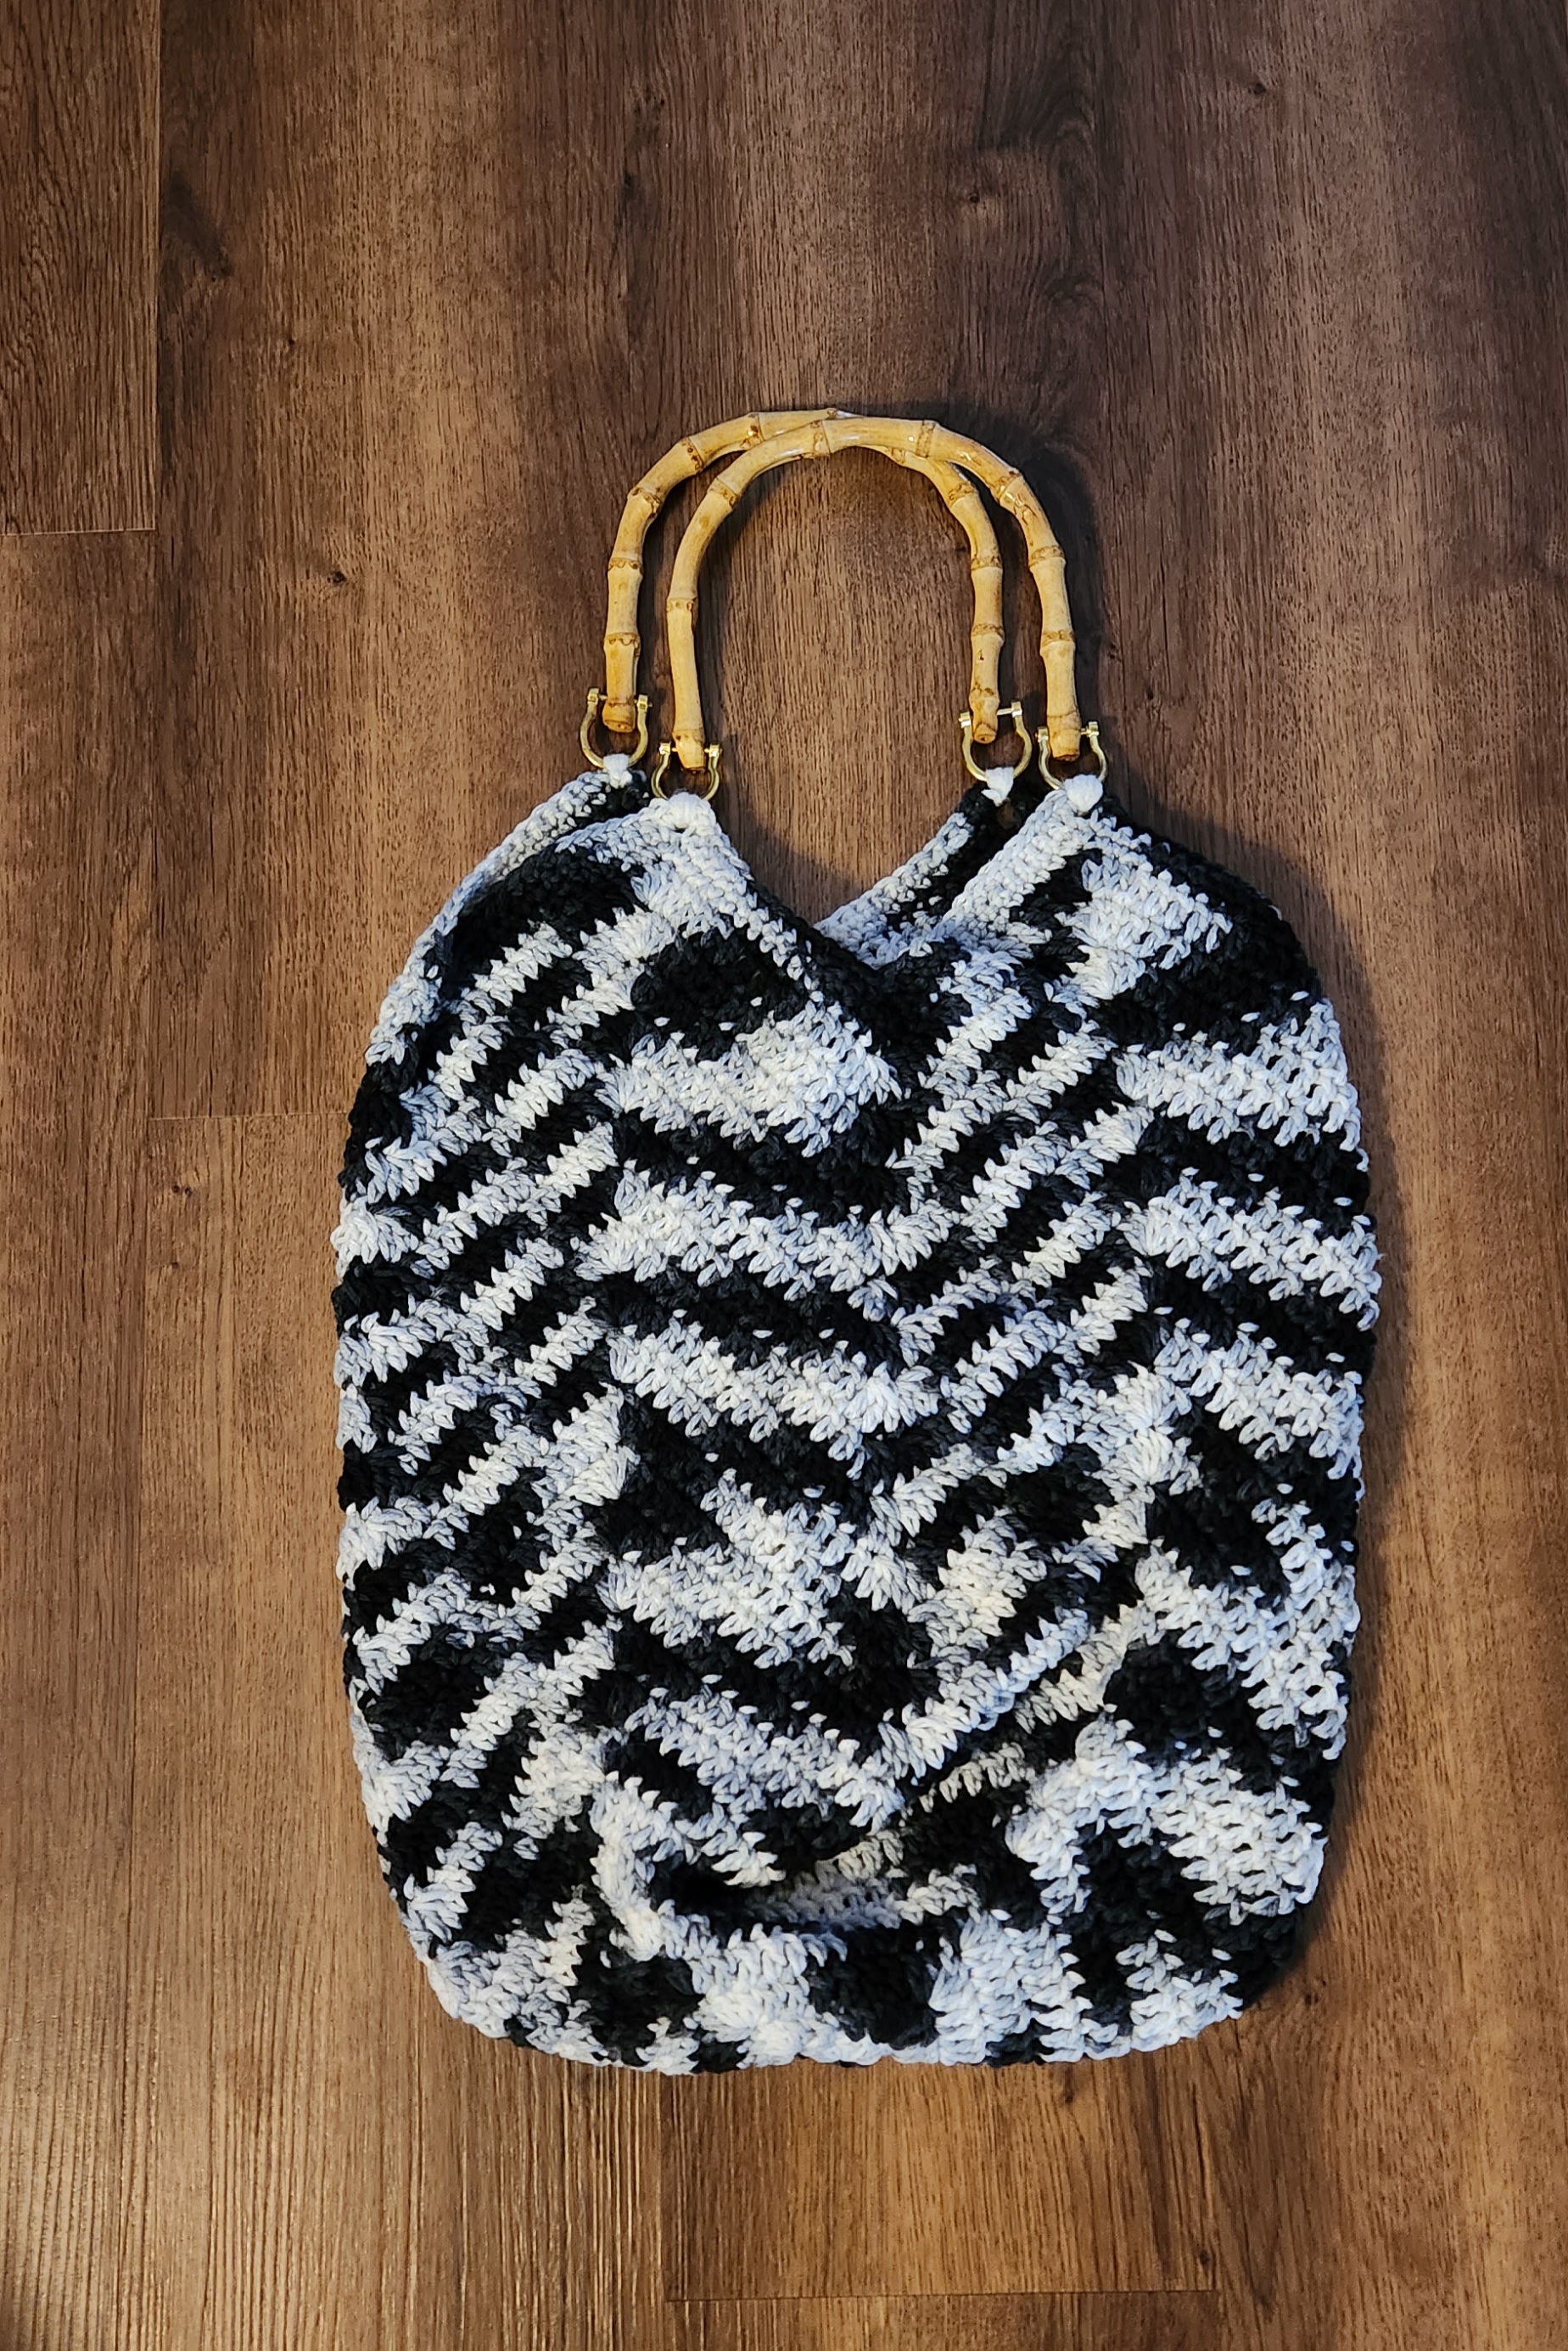
And it wasn't long before I made another one using some leftover Zebra colorway yarn from Red Heart. At first I finished this bag using a set of faux bamboo handles, which looked kind of cute, but the rigidity of those handles made it uncomfortable to wear the bag over my shoulder.
So instead I found these nifty black faux leather 16-inch purse handles on Amazon that have lobster clasps at the ends, making it possible to easily put the straps on/off and use them on another bag, if the need arises. It would have been even better if I could have found these in a 24-inch length (like the straps I used on Linda's bag), so I'll be watching to see if I can find some longer straps eventually. (Update: Found some 24-inch ones at Amazon here.)
I wanted to try making another Swingy Shawlivest, but this time with pockets.
The pockets are lined with fabric and are about 6 inches wide by 7 inches tall. I worked the pockets in an edc post stitch faux rib to sort of resemble the pattern of the vest fabric beneath but with a solid fabric to conceal the pocket lining.
It's nice to have pockets, but I decided if I make another Swingy Shawlivest with pockets, I'll make the pockets bigger next time. Maybe 8 inches by 9 inches or so. Here's a link to my Ravelry project page.