Showing posts with label lanyard. Show all posts

Thursday, July 3, 2025

Pen Pocket for my Doc

At my recent checkup, my doctor, who is an active duty officer in the Air Force, was complaining that she didn't have anywhere to carry her pen in her Class B uniform blouse. (The Air Force women's Class B uniform blouse doesn't have any pockets.)


My husband mentioned to her that when he's wearing a shirt without a pocket (which almost never happens anymore), he would clip his pen so that it was sticking out between the buttons in the front button placket. My doc thanked him for the suggestion but pointed out that wearing a pen that way would not only technically make her be "out of uniform," but that it also wouldn't sit as well on a woman (breasts, obvs). I included a random photo from the internet, below, to show (more or less) the way my husband was suggesting she could wear her pen, except that this picture doesn't show the pen's clip holding onto the front of the button placket the way my husband was describing.


My doc was wearing an ID lanyard, however, so the idea that popped into my head was to sew a pen pocket for her that could be attached to her lanyard and was made from a similar-color fabric as the light, almost baby blue of her uniform blouse (in the hope that the color would make it less conspicuous). The only way I would ever be able to exactly match the fabric color is if I were to buy a woman's Class B uniform blouse at the AAFES clothing sales and cut it up to use the fabric to sew the pen pocket. So I'm hoping that the fabric I used will be a close-enough match.

I asked her if adding a pen pocket like that to her lanyard would make her be considered to be "out of uniform," and she didn't think that it would, so we agreed that a pen pocket on her lanyard could maybe work for her.

I told her I would sew one for her and bring it to my next appointment (whenever that is! LOL! I don't actually see her very often).

After searching around online, I settled on this tutorial by Ashley Hough for how to sew an elastic bookmark, because the pen/pencil pouch portion of the tutorial was a close match to what I had in mind to give to my doctor. The only real difference with mine is that instead of sewing the pouch to the long loop of elastic, I added a button hole to the top flap for the lanyard's plastic loop to fit through. (This was the first time I'd ever used the button hole function on my new sewing machine, so that was exciting, too. I think it turned out pretty well and was a lot easier than the way I used to have to sew button holes.)


The finished dimensions are about 6.5 inches long by about 1.75 inches wide. It has two pockets, so it can hold two pens or one pen and one pencil. It was a quick and easy project and only required just a small amount of fabric. I also added featherweight fusible interfacing to the back of both pieces of fabric to help them hold their shape. 

I hope my doctor finds this little accessory helpful while she's on the job!

Friday, January 25, 2019

Lanyard and Pouch for Glucose Monitor free pattern

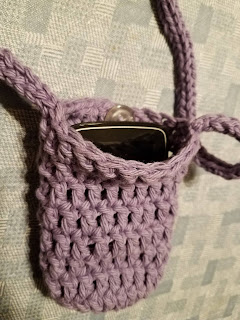
This is a simple crocheted pouch in a size intended to fit the Freestyle Libre glucose monitor or other devices of comparable size (about 4 inches tall by 2.25 inches wide by 0.5 inches deep). The pouch has a button closure at the top to keep your monitor secure. Having the pouch attached to a lanyard makes it possible to wear your monitor at all times (I mostly wear mine this way while I’m sleeping) and have it within easy reach when you need it. Download the free PDF from Ravelry here.

Pouch is worked in crochet; lanyard i-cord is knitted. You can opt to work the i-cord in crochet, if you prefer, or use some other method to make the lanyard. You may also make the lanyard longer or shorter, depending on what’s most comfortable to you. I like a 32-inch-long lanyard because it’s long enough that I can scan my sensor during the night without having to take off the lanyard or remove my monitor from the pouch. During the overnight hours I usually don’t need to see the monitor’s readout; I just press the monitor’s button through the pouch, scan, and go back to sleep. So here’s a common-sense note: You will have to remove your monitor from the pouch if you need to see the readout after scanning.


I also find that the i-cord stretches out after wearing this for about a week, but popping the pouch into the washer and dryer along with a load of laundry tightens the stitches right back up.


This pouch-on-a-lanyard can also be a fun item for children (only ones who are old enough to safely wear a lanyard around their neck!!) to gather small treasures during nature hikes or shells and stones while walking on the beach, etc. -- just make the lanyard a shorter length to fit your child.

Wednesday, June 13, 2018

Lanyards for festival season

Break out the handmade lanyards — it's festival time again. 


Knitting a long 3-stitch i-cord is a fast and easy way to make lanyards that are soft and comfortable to wear. These won't cut into your skin or feel scratchy like standard ribbon lanyards or lanyards with breakaway clasps. You can customize your lanyard by using any colors you desire and even add beads or other findings for a truly unique piece that suits you.

I used worsted weight yarn and size 6 DPNs to make the lanyards in the photo, but they can be made with any yarn weight and needles that give you a nice, snug gauge on the i-cord. Leave a 6-inch tail at each end of your work so you have plenty of length to secure the hardware and fasten with knots before weaving in the ends.

I'm thinking a nice fingering weight yarn on size 1 needles with lots of sparkly seed beads would make a lovely one. I'm going to have to try that next.

These work up quickly. I made the worsted weight ones approximately 36-38 inches long, and they each took just about an hour to knit. (Adding beads would, of course, make the knitting time significantly longer.) At this gauge my lanyards each used about 12.5 yards of yarn. After fastening off and securing the hardware with a few knots and weaving in the ends, I'd estimate each lanyard takes about 90 minutes to complete. And you could easily sell these for about $10 each, depending on your audience, so ... not a bad ROI.

Before tying the ends together add a small keychain split ring or a large jump ring and a spring-close clip or lobster clasp. Tie the ends together over the split ring/jump ring and weave the ends back through the i-cord. Simple, easy finish.

Monday, May 24, 2010

Lanyards

For a while now, I've been wanting to craft some hand-knotted/beaded lanyards on which to wear my credentials to work. There's a great site called BooJee Beads where I could buy some really cool handmade lanyards, but I think it would be a lot more satisfying (and a lot less expensive) to make them myself.

So I finally got my thoughts organized and found a great site - Free-Macrame-Patterns.com - with free macramé instructions and patterns, including detailed instructions for how to craft jewelry and related items out of small cords (like 1 mm hemp or embroidery floss), which is the size I had in mind for making my lanyards.

I first wanted to make a lanyard with a spiral pattern. This page at Free-Macrame-Patterns has simple, detailed instructions for how to create the spiral effect. I wasn't able to find embroidery floss at Walmart to begin my project, so I settled for 1 mm hemp, which is probably a lot easier to work with because it's less slippery than the floss, so it holds the knots much better.

Step 1: Mount two cords to a ring or holding cord. This will give you four strands to work with. Using the two outside cords as your working cords, tie the first half of a square knot (i.e., a half knot).

Step 2: Repeat the half knot over and over. Make sure you tie each of the knots exactly the same way. The cords will twist to form an attractive spiral chain.


Here's a photo of my first work in progress. I started with blue and yellow strands.


And here's the finished lanyard:
 

Here's the second lanyard: