Showing posts with label hand-knitting. Show all posts

Tuesday, December 23, 2025

The Simple Thing plus hood

If you like the look of the Sophie Scarf, then give this free pattern for The Simple Thing by Melina Brell a try.


I ended up cannibalizing the yarn and needles from my attempt to make the Slice of Goodness Wrap by Purl Soho to make this project. I really, really wanted to finish Slice of Goodness, but the process was going to be very lengthy, and even though I made it to around halfway through, I lost the will to go on.
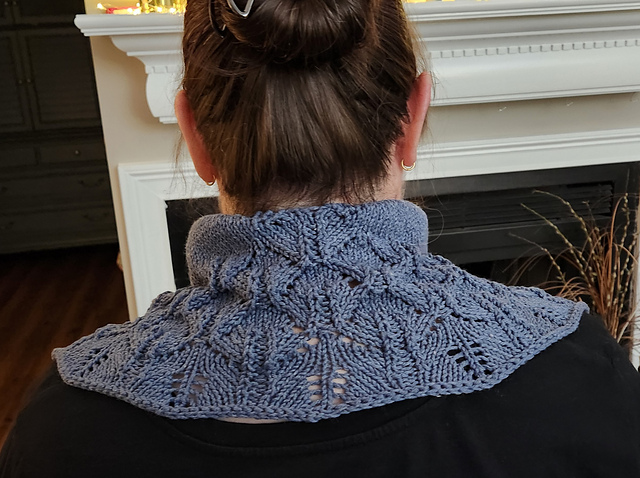
Gauge shot

I had been aware of the Sophie Scarf design for a while, but that design by itself didn't intrigue me, mainly because I don't like short scarves. I do like i-cord edges and garter stitch, however. So when the Sophie Hood version was released, that's when I started getting interested.


So my plan is to see if I can approximate the hooded version of this scarf by using The Simple Thing as my starting point.


HeathlandKnits has a good video tutorial on YouTube that walks you through the setup process for The Simple Thing scarf, and I highly recommend that you watch that video when casting on. There is also a video showing how to graft the ends together when finishing the scarf. Both of the video links included in the PDF of the pattern appear to be broken, so that's why I'm sharing the links with you here. It took me a bit of clicking around to find them.

Part 1 done

Because I prefer my scarves on the longer side, I'm making this using a 6-row repeat instead of the basic 4-row repeat suggested in the pattern. Whatever length you prefer for your pattern repeat, definitely use a stitch marker that opens/closes as a progress keeper! This almost becomes a mindless knit with the help of a progress keeper clipped to your project. 

Part 2 starts with a buttonhole

I originally planned to have the scarf part be at least 30 to 36 inches long and around 10 inches wide on each side before starting on the hood part. The way I'm visualizing this coming together, I'll have to knit each scarf side before joining them together to knit the hood. I haven't done that sort of thing before, so we'll see if it works. 🤞

Parts 1 and 2 complete

Part 1 ended up being about 27 inches long by 9.5 inches wide at widest end, or 50 stitches (not counting i-cord stitches) by 296 rows. I started part 2 by making a buttonhole at the tip, which required it to be a bit wider than the tip of part 1, so I knitted a few rows without increasing part 2 until the width at that length was about the same as on part 1, and then I continued the same increasing pattern (every 6 rows) as on part 1 until achieving the same overall width and length.

Before grafting the i-cord edging

After joining the two sides to begin the hood (and adding stitches along the i-cords at the back of the neck for a comfortable fit), I ended up with 120 stitches on the needle, not counting the i-cord stitches on each edge of the work. This will give me a hood with enough depth to comfortably fit over my hair, which I usually wear up in a messy bun style. 

Start of part 3

There is a Sophie Hood video tutorial that shows some key techniques for that pattern, and in watching that video, it's clear that I'm using a different method to knit the hood for my project. They knit the hood flat (in line with the scarf) and have a seam to join the entirety of the sides of the hood at the back; I'm also knitting my hood flat, but I'm doing mine seamlessly (bottom up) except for where the top edge will be grafted. 

Rescue line added before starting hood decreases

I debated for a while how to work the top of the hood, meaning whether I would attempt to make the back part slightly shaped/rounded with short rows or decreases. Finally, I found this video tutorial by Yuha Knitting that shows an easy-to-understand method for making decreases to help make the back of a hood knitted like mine a bit rounded, so it looks less pointy on the wearer's head. I think I'll try doing mine that way. (I could also envision a method of working short rows on either side of the center of the back of the hood to shape the crown that way, but I just didn't want to work that hard, so I'm glad I found the technique by Yuha Knitting!)

Hood complete with crown decreases

To prepare for the decreases, I added a marker to show where the center of the back of the hood was, and I will make the hood decreases on either side of that marker. I also added a marker to show when I was working a right-side row, since I intended to work decreases only on the right side of the work. Lastly, I added a rescue line in the last row before starting to decrease, just in case I wasn't happy with how the decreasing section was going. It would be easy to rip back and start the section again if needed. 😂 The decrease before the marker will be a left-leaning decrease (SSK), and the decrease after the marker will be a right-leaning decrease (K2tog).

Hood complete with top seam closed

I calculated that I wanted to decrease the crown of the hood by about 40 stitches (about one-third of the hood's total width), which, decreasing 2 stitches on each right-side row, would require 40 rows to achieve. (With decreases worked only on right-side rows, every decreasing row is followed by a non-decreasing row on the wrong side, so 20 decreasing rows plus 20 non-decreasing rows equals 40 rows total.) Based on my estimated gauge, those 40 rows would add about 3.5 inches of height to the hood. And since I wanted the total height of my hood to be about 13-14 inches (measuring from the top of my shoulder to the crown of my head), that meant that I should knit about 10 inches of hood before starting the decreasing rows.

Time to add a button

I also found a nice tutorial by Lindsey of the Yarina blog hosted by Custom Yarn that shows how to join the top of a hood knitted in garter stitch like mine using a 3-needle bind-off technique that blends invisibly into the established garter stitch. Woo-hoo! I'm going to try doing that, too.

Button info


Monday, July 28, 2025

A Chicken for Suzanne

My dear friend Suzanne is a self-proclaimed "chicken gal" and suburbanite-of-necessity who longs to return to her farmgirl days living in the country with a yard full of chickens.


What better way to celebrate her upcoming birthday than sending an Emotional Support Chicken for her to hug and hold while she dreams her sweet farmgirl dreams?


The Emotional Support Chicken by Annette Corsino is just a downright fun pattern to knit, and I think it looks best when executed in tweedy-ish yarn colorways that are reminiscent of the feathers of real chickens. When I saw the lovely marled colorways of KnitPal Cotton to the Core, I just knew they would produce some lovely chickens well worth adding to any metaphorical flock. For this hen, I'm using Caramel Brown as color A and Fresh Peach as color B.


This yarn is on the lighter side for being labeled as a worsted weight - definitely much lighter than the stuff that Red Heart labels as worsted weight. In my opinion, it's closer to being DK weight. I'm still using the needle size specified in the pattern, though, so we'll see how big this hen ends up being compared to the other ones I've knitted with Red Heart. 😅 


I hope Suzanne loves her new chicken, and if she gives it a name, I will update this post to let all y'all know what it is! 💜🐔💜


I'm pretty sure that Suzanne's chicken is the first one of these that I've managed to sew together according to the way the pattern designer intended. Yay!

Monday, June 2, 2025

Emotional Support Chicken

I just couldn't resist the allure of the Emotional Support Chicken any longer. Meet Scrappy Henrietta! 😍


This pattern arrived on the knitting scene sometime in 2023 or 2024 (I believe), and the internet practically EXPLODED with excitement.

I added the pattern to my Ravelry favorites for safe-keeping but decided to wait before making one. I noticed, however, as the months went by the way the emotional support chicken consistently remained on the first page of Ravelry's "hot right now" designs, suggesting that the internet's adoration for the ESCs had yet to abate. It was on FIRE.


Eventually, I just couldn't resist the pull of the ESC any more.  


I think the thing that put me over the edge was when I discovered that The Knitting Tree LA had made a companion video for the pattern. Checking out the video was my undoing. 😂

Tail part 1

I grabbed a long old scrap of Hobby Lobby's I Love This Yarn in the Jazzy Stripe colorway (left over from an Infinite Granny Square afghan project) and cast on to follow along with the video, which starts at the tail.

Tail part 2

For part 2 of the tail and the main part of the body, I used a couple of long scraps of Red Heart With Love in the Pewter Gray colorway that were left over from when I made my Autumn Mists vest with no pattern.

Tail and main body

I don't know which yarn I used for the neck and head, but it was one long scrap of an ombre-ish yarn with purple, dark pink, and raspberry colors that is probably something by Red Heart, but I didn't have a label for it anymore.

Neck and head added

I used up the remainder of the raspberry ombre scrap for the top end of the undersection piece, and more of the gray yarn to finish the undersection.

Henrietta got a bit wonky as I was sewing her up, where the two ends of her neck stripes don't line up at the front, but hey. She is still adorable, and I wuv her!! She has 15 mm blue safety eyes from a pack that I bought off Etsy years ago from a seller named 6060, who is no longer active on the site. Whenever I'm installing safety eyes, I always use this tool to help set the backs, because it makes it a lot easier for my arthritic hands to handle the task of snapping them on securely.

You might be able to knit a whole ESC by only watching the video, but I think the video really makes a better accompaniment if you also own the written pattern, so before I reached the end of the first tail section, I bought the pattern: And the emotional support chicken claimed yet another willing (happy) victim. 😂

I followed this up by making a friend for Scrappy Henrietta, another Emotional Support Chicken, Scrappy Patty, in colors to match our guest bedroom.

Scrappy Patty and Scrappy Henrietta

 
Scrappy Patty sitting on the bed in our guest bedroom

Scrappy Patty side view

Monday, August 7, 2023

Witchypoo Scarf

This pattern came to me when I was drifting in that place where I was not quite asleep but not quite awake. It's an easy crescent moon-shaped scarf that can be made with just about any yarn at any gauge. Just in time for Halloween stitching, I present to you the Witchypoo Scarf!


The Witchypoo Scarf can be made in a solid colorway, or a variegated, or an ombre, or in any yarn that your heart desires, but I think making it in two colors really makes the curves of the crescent shape pop visually.

304 stitches on needle

Comprised of mostly mindless, movie-watching-friendly, reversible garter stitch, you only need to pay attention to what you're doing during the first few stitches of each row, where the bottom edging detail is worked as you go.

200 stitches on needle

This pattern is best worked with an interchangeable needle with a long cable (at least 42 inches) to accommodate the large number of stitches.


Seeing the black and purple stripes in my scarf reminds me of the fun witchy-poo striped tights that my daughters used to wear at Halloween, which are memories that bring a smile to my soul. I hope your soul will find reasons to smile, too, as you knit and wear this scarf.

Measuring my gauge

As you can see in the "measuring my gauge" photo above, my gauge is about 4 stitches per inch and 4 rows per inch. Details about the yarn and needles used are on my Ravelry project page.

The scarf grows quickly; the only reason why it took me a couple of months to finish mine is because I was multitasking and working on several other projects at the same time. 😂 

My only question now is: Should I release this scarf design as a paid pattern? Would you be interested in making it if the pattern was available?

Sunday, July 16, 2023

Zuzu's Petals - fingering

This is my very first project using fingering weight yarn! And if that weren't a cool enough fact all by itself, the yarn I'm using is a lovely ball that I found at a thrift shop for only 99 cents! How's that for cool?!


The yarn didn't come with a manufacturer's label on it, so I have no idea what brand it is or even what the fiber content is. It kind of feels like it has cotton in it; it might even be 100% cotton, for all I know. I just liked the color - it reminds me of the faded grayish blue of denim blue jeans, and I think it will make a lovely Zuzu's Petals cowlette. This is a paid pattern designed by Carina Spencer.


Because the width of the neck opening was only 16 inches when I reached the end of section 1, I knew I would need to keep adding width to make it be possible to pull the cowlette over my head. I decided to work two more 12-row repeats, hoping that would bring the width to something closer to 20 inches wide, which I figured would be a dimension that would fit better over my head. That meant my final stitch count at the end of section 1 was 151.

End of section 1 with 103 stitches


End of section 1 with 151 stitches

As I got toward the end, I was worried about losing at yarn chicken (running out of yarn, in other words). So I skipped the optional purl round and instead went directly to the cast off. But then, after casting off, I could see that I did actually have enough yarn left on the skein to be able to do the purl round, so I tinked back the cast-off round and added the purl round before casting off again. I just knew that I would always regret not having the purl round in there, if I didn't add it, because it really does help straighten out the edge curling, even before blocking. 

Before blocking

I could have saved myself the trouble of tinking back if I had weighed my skein when working the last few rounds. If I had weighed it, I would have been able to know that I'd have enough to work the last optional purl round before casting off. Live and learn! But it was pretty close!

Blocking

Gauge


Monday, February 20, 2023

Haiku Cardi


Finished cardi

It would have been helpful to me if the pattern had provided more of an overview description of the process of how the cardigan will come together, because although I do enjoy patterns with unconventional construction techniques, If I had realized before starting this that the fit of the cardigan would be closer to that of a cocoon-style cardigan with a sort of dolman-type sleeve, I might not have opted to work this pattern, because I generally don't care for cocoons or dolman sleeves.


Nevertheless, I am glad that I made this cardigan. It is a paid pattern designed by Svetlana Volkova. At about 21 inches length, measured from the top of the shoulder, I decided to add pockets of 29 stitches wide by 44 rows deep. I knitted the pocket linings in contrasting black yarn.


Some ways I deviated from the written pattern include making simple kfb increases instead of M1R/M1L increases and adding the pockets. I like the oversized fit even if the cardigan is somewhat less constructed than I had expected before starting the project. Total stitches after rejoining below armholes: 253.

This cardigan begins in the center-back and works upward from there in the shape of a triangle. When the triangle is large enough, the point of the triangle is at the back of the wearer's neck, and the wide side of the triangle wraps around the waist. The slanted sides of the triangle are then worked separately to finish the upper back on each side and wrap around the shoulder and become the upper front on each side. The front sides are then rejoined to the back to form the arm holes and stitches picked up along the bottom of the triangle. Then all stitches are knitted together to make the bottom part of the cardigan.

I do like how this project turned out, but I think if I make it again I will incorporate garter stitch instead of ribbing, because the ribbed front placket on this one wants to fold over toward the stockinette. Hopefully washing and blocking will fix that issue, but I'm thinking that using garter stitch plackets would naturally lie better than the ribbing.