Showing posts with label workedflat. Show all posts

Thursday, January 27, 2022

Luna Triangle Cowl

I really like pullover triangle cowls. They look amazing, they are so easy to wear, and they keep your neck, shoulders, and chest nice and cozy. So when I saw the super cute Luna Triangle Cowl paid pattern by Deni Sharpe, I knew I wanted to make one for myself.

I deviated from the pattern in a few ways. First, the pattern is written for bulky (size 5) yarn using an 8mm hook, but I made mine in aran weight (since that's what I had in my stash) with a 6.5mm hook. I also opted to hand knit the ribbed top of the cowl instead of working it in crochet.


The knitted part I did in a lofty and reversible fisherman's rib worked in the round over 80 stitches. I followed the tutorial for this technique at this link. Then I picked up the stitches for the first row of crochet to begin the triangle portion of the cowl. Since I was starting with a different number of stitches for the bottom part of the cowl than was listed in the pattern, I had to adjust the stitch counts for the triangle part of the work.


Sunday, May 23, 2021

True Blue Boomerang Scarf

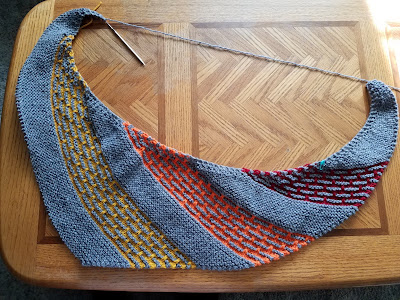
This is such an easy, mindless knitting pattern, and it gives you a nice, long/shallow, asymmetrical triangle in garter stitch that curves nicely around your neck as either a scarf or a shawl (depending on how big you knit it to be). It's a simple two-row repeat that's very easy to remember.

This one ended up being about 58 inches long finished length from tip to tip. I didn't have a full skein of this yarn (Red Heart Super Saver Ombre in the True Blue colorway) available, so I just knitted until what I had was about to run out and then cast off. 

You can make this with any yarn weight at any gauge, just choose a needle size based on your yarn size that gives you a fabric with a nice drape (not too stiff). To begin, cast on 5 stitches. Row 1: kfb, kfb; knit to last 2 stitches; k2tog. Row 2: knit.

That's all there is to it! Just keep repeating those two rows until your scarf or shawl is as big as you'd like. I recommend using a stretchy cast off, such as: Knit the first stitch; slip the stitch you just knit back onto the left needle; then knit two stitches together through the back loop. Repeat by slipping that stitch back to the left needle and knitting two stitches together through the back loop until all stitches are cast off.

As you can see, I have knit this type of scarf a few times before:


Thursday, March 19, 2020

Big Mug Hug - free pattern

I've been wanting to make a mug cozy that was big enough to fit our oversized, square-bottomed mugs. The cozy needed to be made with cotton yarn so it would be microwave-safe. After all, it's so much easier to put the cozy on the mug when it's empty, and THEN filling the mug with water, and THEN zapping it in the microwave for tea. 


Who wants to pick up a mug filled with scalding-hot water and then try to slip on a cozy without sloshing the water and burning yourself? Not me.

This cozy is quick to make and extra-thick thanks to the post stitches used on the cozy sides, and because the cozy covers the base of the mug it also protects your tabletop. It's easy to put on and remove thanks to the handy button loop.

Big Mug Hug

U.S. crochet terms

Materials: Worsted weight 100% cotton yarn, 5.5mm crochet hook, yarn needle, scissors. (My sample uses Peaches n Creme Ombre in the Blue Moon Ombre colorway.)

Start off working in the round:

Setup/row 1: In a magic circle, ch 2, DC 10. Join with sl at top of first DC. (10) [ch 2 doesn't count as a stitch in this pattern]

Row 2: Ch 2, 2 DC in each st around. Join with sl at top of first DC. (20)

Row 3: Ch 2, [2 DC in first st, 1 DC in next st.] Repeat around. Join with sl at top of first DC. (30)

Row 4: Ch 2, 2 DC in first st, 1 DC in each of next 15 sts. 2 DC in next st, 1 DC in each st to end. Join with sl at top of first DC. (32)

Now continue working back and forth in rows (do not join at end of rows for the rest of the pattern):

Row 5: Ch 2, FPDC in each st across. Turn. (32)

Row 6: Ch 2, BPDC in each st across. Turn. (32)

Repeat rows 5 and 6 until the cozy sides are a total of 10 rows tall. 

Row 15: Ch 1. Turn. HDC in each st across. (32 HDC)

Finishing: Sew a button in a top corner of the cozy as shown in photos. Slip cozy over your mug, hold the sides snugly around your mug the way you want it to fit, and then measure how long of a chain you need to reach from the other top corner of the cozy (the corner without the button) to the button and back to the other corner. Add a crochet chain of that length to the top corner without the button. Tie ends of chain to cozy to secure. Weave in ends, slip the cozy onto your mug, and enjoy.


Sunday, October 12, 2014

Simple Vertical Stripe Placemat free pattern

Just published on Ravelry: my new free crochet pattern for a Simple Vertical Stripe Placemat.


This super-easy project works up in just a few hours. I hope you will go check it out!


I made this one with Lily Sugar ’n Cream in Country Side Ombre, which gives the fabric almost an argyle plaid effect that I really like.